SETTING IQSO UNTUK ORARI INDONESIA KHUSUS USER ORARI

halo apa kabar semua... saya YD6BTM mau membuat tutorial menggunakan IQSO dengan TEAM SPEAK untuk para anggota amatir radio indonesia,,,,

untuk ini saya cuma mengingatkan ini khusus untuk anggota AMATIR RADIO...

langsung saja
first.. (sok english dikit biar keliatan paten) :D

you need to download team speak from here (di klik saja)

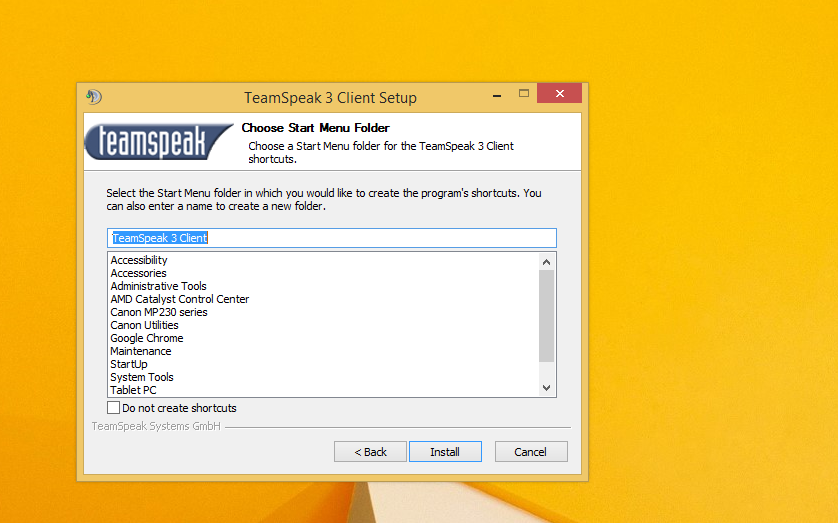
kedua install team speak nya


ketiga setlah semua beres dan siap install tinggal klik finish plikasi nya akan otomatis di jalankan (conteng di run team speak client) kemudian akan keluar teamspeak nya... kemudian muncul box team speak setup wizard.. di next aja... sampe keluar permintaan nickname anda.. seperti ini


kemudian isi nick anda saya anjurkan nick nya callsign anda.... mungkin kalau anda suka main game juga bisa isi nya dengan nama atau id game...

kemudian akan kluar box settingan PTT sperti ini..

sett hotkey sesuka anda (klik saja kemudian pencet key apa saja sesuka anda )
 kemudian klik next sampai ke finish...


kemudian klik connection > connect
isi tab nya sperti ini
nickname harus call sign anda


server : iqsospeak.no-ip.org

klik konect
salam kompak orari
salam terbaik... 73

intel HD 4000 on osx niresh

The following method works for Mac OS X Lion 10.7.5 and OS X Mountain Lion 10.8. If you're using an older version of Lion, you might be able to install BridgeHelper 5.0 and get the same result.

Intel HD 4000 graphics are included in a few of Intel's newest 3nd-generation processors, which are known as "Ivy Bridge" processors.

Many Ivy Bridge processors only use lower-end HD 2500 graphics, which don't work with the method in this guide (check out our guide to HD 2500 graphics instead). If you want to find out whether your Intel processor uses HD 2500 or 4000, you can Google the model of your processor. For example, if I search "i5-3570K" on Google, the first result is Intel's official page for the Intel Core i5-3570K. According to the "Graphics Specifications" section of that page, the i5-3570K processor uses "Intel® HD Graphics 4000", which will work.


1. Install a patched version of Chameleon or Chimera
Even though Mac OS X includes drivers for Intel HD 4000, these drivers don't work on Hackintoshes by default. A Hackintosh relies on a bootloader (such as Chameleon or Chimera) to inject the device ID of its graphics card into Mac OS X, in order to enable graphics support. Otherwise, Mac OS X has no idea what graphics card the Hackintosh using.

However, the current versions of Chameleon and Chimera don't include the device IDs for Intel HD 4000 yet. For this tutorial, download and install a patched version instead-- download links below.

DOWNLOAD: Chimera [PATCHED]
DOWNLOAD: Chameleon [PATCHED]
Downloads provided by Henry Wong from stuffedcow.net.

Once you've downloaded Chimera or Chameleon (either will work), run the .pkg installer. Complete the installation process, and then proceed to the next step.

2. Select a device ID
As Mr. Wong explains on his blog, there are 11 device IDs (known as AAPL,ig-platform-id device properties) that Mac OS X uses to identify a graphics card as Intel HD 4000. In order to enable graphic support for HD 4000, you need to have Chimera or Chameleon inject one of these device IDs into Mac OS X. Below is a chart of all available device IDs.

Each device ID helps Mac OS X recognize your HD 4000 graphics in a slightly different way. The number of "Ports" is the number of input ports (such as DVI, HDMI, etc.) that will work with each device ID. You probably want to choose a configuration that works with at least 3 ports. The "Memory" column represents how much internal graphics memory you should set in your BIOS, for that particular device ID (more details about that in Step 3).

You can choose which device ID to inject by editing org.Chameleon.boot.plist, the settings file for Chameleon and Chimera. Go to /Extra in your main hard drive, and open the file org.Chameleon.boot.plist . Inside that file, add the following property:

<key>HD4000PlatformId</key>
<string>0</string>

The "0" stands for 01660000, the first device ID. If you want to use device ID 01660001 instead, replace "0" with "1". And so on.

3. Adjust your BIOS
You need to change the amount of internal graphics memory used by Mac OS X to whatever the device ID specifies. You can do this in your computer's BIOS (which is essentially the settings page for your motherboard). Boot your computer, and enter the BIOS. To enter the BIOS on a Gigabyte motherboard, you have to press the delete key when it boots (before the operating system starts). Different manufacturers set different keys for opening the BIOS.

The specific name for the BIOS setting that determines internal graphics memory size depends on the brand of your motherboard. On Gigabyte motherboards, this setting is literally called "Internal Graphics Memory Size".

Be sure to adjust the setting for "Internal Graphics Memory Size", not "DVMT Total Memory Size" (as Mac OS X ignores this setting).

Say that you're using device ID 01660000. According to chart in Step 3, that device ID requires 96 MB of memory. In that case, set "Internal Graphics Memory Size" to 96 MB in your BIOS. Then press F10 to save your changes and leave the BIOS.

4. Test it out
Reboot your Hackintosh. Once you've booted in Mac OS X, check whether you can change the screen resolution, etc. If not, then you'll have to try a different device ID. Repeat Step 2 and 3. Hopefully, you'll eventually find a device ID that works for your Hackintosh.

Ending Notes
Once you finish Step 4, your Mac OS X should finally be able to display at full resolution and have graphics acceleration. Congratulations!

P.S. The VGA port on your monitor will not work (real Macs don't have VGA ports). You have to use either the DVI or HDMI port on your monitor.

http://www.macbreaker.com/2012/07/intel-hd-4000-hackintosh.html

SOURCE: Intel HD 4000 QE/CI Acceleration
new kernel

new kernel

While the rest of us slept in, Linus Torvalds kept busy over the weekend, announcing an all new Linux kernel release.
Linux 3.16 is now stable and out there. Wherever there really is.
Typing from his treadmill desk (or possibly not, but the mental image is too humorous to resist) the Linux founder announced the latest stable release with relief, explaining:
“While 3.16 looked a bit iffy for a while things cleared up nicely, and there was no reason to do extra release candidates like I feared just a couple of weeks ago.”

What’s New In Linux 3.16?

Codenamed ‘Shuffling Zombie Juror’, Linux 3.16 arrives on the scene with a bunch of key improvements in tow. These range from complicated and integral sounding – e.g., ‘unified control group hierarchy‘ – to the more user-accessible, like new and improved drivers.
Thanks to the diligent work by Linux Weekly News and Phoronix (plus a good ol’ google on the Linux Kernel Mailing List) we’ve put together a list of some of notable changes featuring in this release.
  • Multi-platform ARM kernel image for multiple ARM SoCs (incl. Exynos)
  • Various support for Nvidia Tegra K1 and Kepler GPU
  • Nokia N900 modem driver included in mainline 
  • Initial Intel Cherryview Support 
  • Improvements to Sixaxis and DualShock 4 controller support
  • Sony-HID driver improvements 
  • RMI driver for Synaptics touchpad
  • Saitek RAT7 gaming mouse fix
  • Dell FreeFall driver
  • 80 changes and fixes to Btrfs filesystem 
  • New audio drivers for misc. Cirrus, Realtek and Analog devices. 
  • Tegra HD-audio HDMI support

Installing Linux 3.16

It’s out, which means you want it. Well, hold your horses. Linux 3.16 is likely to form the basis of the Ubuntu Linux Kernel in 14.10, which is due later this year. The 14.10 kernel will also be provided to LTS users through a point release update shortly after.
If you’re impatient and — most importantly — skilled enough, you can install Linux 3.16 in Ubuntu 14.04 LTS using the corresponding installers for your system listed in the Mainline kernel archive maintained by Canonical.

[FIXED] Install Nvidia with Optimus driver on Ubuntu

Basic Setup
You need to open your terminal and enter the commands below.
If on 12.04.3, replace linux-headers-generic with linux-headers-generic-lts-raring.
  1. sudo add-apt-repository ppa:bumblebee/stable
  2. Enable the Universe and Multiverse repositories (for bumblebee and nvidia packages respectively).
  3. sudo apt-get update
  4. Install Bumblebee using the default proprietary nvidia driver for 12.04 - 13.04 :
    sudo apt-get install bumblebee bumblebee-nvidia virtualgl linux-headers-generic
    • And for 13.10 :
    sudo apt-get install bumblebee bumblebee-nvidia primus linux-headers-generic
  5. Reboot

Advanced Setups

For advanced users, if you do not want to use the proprietary nvidia driver or 32-bit libraries (for example, if you are only interested in power savings), you can do your custom installation.
Minimal setup : sudo apt-get install --no-install-recommends bumblebee
Depending on your needs, add to this line:
  • bumblebee-nvidia: proprietary nvidia driver support (if installed, become default over nouveau)
  • virtualgl: VirtualGL as backend
  • virtualgl-libs-ia32: 32bit support for VirtualGL on 64bit system, necessary to run 32bit app through optirun
  • primus: primus/primusrun as backend (virtualgl Stays default, you need to run optirun -b primus <app>)
  • primus-libs-ia32: 32bit support for primus/primurun on 64bit system, necessary to run 32bit app through optirun

Usage

To run your application with the discrete NVIDIA card run in the terminal:
  • optirun [options] <application> [application-parameters]
Example:
  • optirun steam

For a list of options for optirun run:
  • optirun --help
Normally you do not use optirun for your window manager, installations or other non graphic heavy demanding programs. The optirun command is mainly used for graphic demanding programs or for games.

Power Management

A primary goal of this project is to not only enable use of the discrete GPU for rendering, but also to enable smart power management of the dGPU when it's not in use. We're using either bbswitch (a module) or vga_switcheroo (kernel module, experimental) to do this in Bumblebee.
Since Bumblebee 3.0, this feature is enabled by default, using bbswitch. This allow automatic power management, without any configuration needs.
If Power Management doesn't work on your laptop, please go to this Power Management (PM) page and help to improve Bumblebee.

Troubleshooting

"Cannot access secondary GPU" error

In LTS 12.04.3, 13.04 and later, if your card seems to be inaccessible, i.e.[ERROR]Cannot access secondary GPU - error: [XORG] (EE) No devices detected. you need to edit the /etc/bumblebee/xorg.conf.nvidia (or /etc/bumblebee/xorg.conf.nouveau if using the noveau driver) and specify the correct BusID by following the instructions therein.

or you must see this

http://ubuntuforums.org/showthread.php?t=2080431

Updating drivers

The Bumblebee project recommends you install drivers only through APT and not drivers provided by nvidia.com directly. This said, whenever you update your drivers through the supported repositories, you need to setup the correct config values in /etc/bumblebee/bumblebee.conf. See also this FAQ on github

Example update to nvidia-319 driver

E.g. to update to the latest update of 319.x driver, you need to install it through apt.
sudo apt-get install nvidia-319-updates nvidia-settings-319-updates
Then you need to edit /etc/bumblebee/bumblebee.conf and set:
Driver=nvidia
KernelDriver=nvidia-319-updates
LibraryPath=/usr/lib/nvidia-319-updates:/usr/lib32/nvidia-319-updates
XorgModulePath=/usr/lib/nvidia-319-updates/xorg,/usr/lib/xorg/modules
By running optirun nvidia-settings (or optirun -b none nvidia-settings -c :8) you can assert you are using the installed kernel module and driver.

Uninstall

If you're unsatisfied with Bumblebee, you can remove it via:
  1. sudo apt-get install ppa-purge
  2. sudo ppa-purge ppa:bumblebee/stable
If you want to keep some programs from the bumblebee repository, you can also suffice by removing Bumblebee only (including its dependencies):

  1. sudo apt-get purge bumblebee
  2. sudo apt-get --purge autoremove

soureces : wiki.ubuntu.com/

elementary OS [review]


video review

Community Driven.


elementary has a single goal: to provide the best possible experience for our community. We're driven by a desire to be better, not by a paycheck. Contributors aren't profit-maximizers, they're purpose-maximizers.


Transparent and Open.


We believe in the power of open source and global collaboration. That means anyone can download, use, modify, and contribute to the code we've written to bring their ideas to life. The code is developed in the open, meaning it's available for review, scrutiny, and improvement by tens of thousands of developers all around the world. All before it hits your system.

Beautiful and Usable.


elementary is crafted by designers and developers who believe that computers can be easy, fun, and gorgeous. By putting design first, we ensure we're not compromising on quality or usability.


Modern Computing.

elementary OS is a free replacement for Windows on the PC and OS X on the Mac. It comes with what you'd expect, like a fast web browser and an app store with thousands of apps. Plus some things you may not expect, like free updates and no known viruses.

Speedy


Luna has been engineered from the ground up to be light on its toes. It starts up quickly, logs in instantly, and uses the bare minimum of resources so that your apps enjoy a speed boost as well. And with Luna, you get the same Linux foundation chosen for the world’s fastest supercomputers.

Full of Features


When you install elementary, you’re not just installing an operating system. You’re installing an excellent suite of custom tailored apps that let you get right to business. Easily surf the web, check your email, listen to music, and tackle everyday tasks or pleasures.


Music

Browse by albums, Make playlists, Rate songs, and see similiar tracks.


Midori

Surf the web with the speed of the same rendering engine as Google Chrome and Apple Safari.


Empathy

Connect with Jabber, Facebook, Google Talk, AIM, IRC, Yahoo! and more.


Geary Mail

View multiple accounts, get desktop notifications, and read your mail in conversations.


Shotwell

Import, Organize, and Edit photos. Make a slideshow. Share with Facebook or Flickr.


Updates

Always stay on the cutting edge. Get updates right away, forever, for free.

from : http://elementaryos.org/